Visualizzazione post con etichetta PC6 B2H4. Mostra tutti i post

lunedì 1 marzo 2021

The main cause of accident on Pilatus PC6: HORIZONTAL STABILIZER TRIM

During every training with the PC6 Pilatus there is a deep discussion about the horizontal trim set up and how it works. PC6 looks a simple machine ma if you don't follow few  simple rules basically it's a fathal machine for the pilots and occupants on board. For sure I could say it's an airplane which requires a solid basic training (and not few hours to be safe).

One of the main reasons of PC6 accidents is the result of loss of control of the aircraft following a takeoff with an incorrect horizontal stabilizer trim setting. Normally there are some contributory factors like the incorrect loading of the aircraft, the difficulty of re-trimming the horizontal stabilizer rapidly and an inadequate standard of aircraft operation.

PILATUS urges all pilots to adhere to the procedures given in the AFM.Special attention must be paid to correct trim settings prior to take-off. 
 

During my initial training on PC6 B2H2 in France the basic handling was centered about the use of manual trim. You had to be familiar about leverages over your shoulders, one for the trim and one for the flap. French instructors used to say to me "PC6 is a kinda of truck" (Pilatus est un tracteur...), the engine is so powerful that generates an airflow (and a propeller wash) so strong that is very difficult to contrast manually with a handle crank. This means that you should reduce throttle and then move the trim. It's very difficult when you have the nose high to reduce engine, you should make some turns with the handle crank and then give back throttle very soon. The worst scenario is when you have also a wrong flaps setting. Flaps down increase the trend of the pitch up, normally the bigger handle crank is for flap and the smaller one for trim. If after take off you notice a wrong trim and move the wrong handle crank by mistake you are almost dead with an even more increased attitude up to the stall. 

This the Tail of F-GOME (B2H2) during my preflight inspection

Therefore the classic aircraft has a manually controlled elevator operated by cables and push- pull rods from the control column. As forementioned the Pitch trim is achieved by varying the incidence of the horizontal stabiliser through the rotation of a crank positioned on the cockpit roof on the centreline of the aircraft.
This crank has a range of 19% turns (clockwise as viewed by the pilot) from the full nose-down trim position to the full nose-up position. Aim position indicator adjacent to the handle is calibrated linearly from 7 divisions nose up, through zero, to 5 divisions nose-down. So I had to keep in mind all the times how many turns to do.

Climbing  and stalling speeds 
The following data is extracted from the aircraft's Fight Mamual, as applicable to a gross weight of 4,850 bs (2,200 kg)
  • Recommended rormal climb speed (takeoff power, flaon 28)........................... 56 knots IAS 
  • Recommended climb speod for maximun perfomance (lake-off power, laps 28) ...45knots IAS 
  • Note: The manufacurer states that the aircraft must be flown accurately if the aircraft is climbed at the maximum performance climb speed. 
  • Stalling speed (power off, faps 28, wings level).................................... 45 knots IAS 
  • Note: The stalling spoed with power on is not given, but will be a lower value.
from my personal notes

But why is so difficult to trim the Porter manually with high power? Basically with the stick we move the elevetors, but with the trim we move all the horizontal tail (like a stabilator). The gimbal of the tail is in front, the action of the trim is applied behind. If I push down the stick the elevetor goes up and I have to win this force against if I move the trim (which moves the tail in opposite direction). For this reason I have to realase the pressure from the stick, move the handle crank in the right direction, and then apply pressure on the stick again. Not easy while you are under upset recovery manouver. Another way to win this force si to reduce throttle and so the propeller flow (counter  instict if your nose is up).

A tecnique taught by my instructor in France is to put the handle crank at 90 degrees position above your shoulder, and then move it towards to you for trim up, and opposite direction to trim down. It really works!

The Trims control is the main check before take off. It's part of the 5 items checklist before take off (See this post in Italian).

In 2000 PILATUS went one step further and developed a Trim Warning System, which is offered thru Service Bulletin 180. This system will warn the pilot already on the ground about a dangerous out of trim situation.
The installation of a trim warning system such as SB 180 was mandated by FOCA, DGAC and ENAC and PILATUS strongly urges all operators to install the trim warning system as offered thru SB 180. 
 

A modern touch about the last PC6 is the fully electrically driven trim system for all three primary flight controls. There is no manual hand crank system now. The rudder trim takes a little getting used to as there’s almost no feel or no kick back through the pedals when you’re in balance but you get used to it.

The pitch trim is the most important of the three trims. The hat switch on the control stick controls an electrical motor that moves the entire horizontal stabiliser which is a VERY powerful control surface. So much so that if you get a trim runaway (where a switch gets stuck and the trim motor keeps going until it reaches it’s control limit), you will struggle to maintain control of the aircraft.


In order to save you getting into a situation where the trim is locked against a limit, Pilatus have installed a trim interrupt switch right next to the power levers which when engaged will disable all trim switches. Once engaged you then pull the circuit breaker of the problem trim motor and close the interrupt switch. The elevator trim also has a secondary motor which can be engaged to re-trim the stabiliser should the primary one have failed as it is such an important control surface.
 
The Trim Runway Emergency was part of my B2H4 differential training

The horizontal stabilizer electric trim system consists of:
  • A dual motor (Main and Alternate Motors) electrically-operated linear actuator, one end attached to a support frame in the rear fuselage and the other end attached to the horizontal stabilizer.
  • A normal trim control system which incorporates two three-position spring-loaded trim switches and two relays. One switch is located on each of the two control column grips. These switches control the Main actuator, which operates at twice the speed of the Alternate Trim System actuator motor.
  • An Alternate Trim Control System which incorporates an actuator control switch positioned on the instrument panel and labelled ALTERNATE STAB TRIM, NOSE DN, NOSE UP.
An Interrupt system which incorporates a guarded switch positioned on the instrument panel shelf and labelled TRIM INTERRUPT. When the TRIM INTERRUPT switch is in the ‘NORMAL’ position, both the Main and Alternate systems are active. When the TRIM INTERRUPT switch is in the ‘INTERRUPT’ position, both the Main and Alternate systems are inactive. 

An electrically-operated trim position indicator located on the upper left side of the instrument panel.

Main System


Normal longitudinal trim operation is accomplished by operating either the trim control switch on the pilot's control column grip, or, the trim control switch on the co-pilot's control column grip. Both switches are similar and are spring-loaded to neutral. The trim control switch on the pilot's control column has priority. Nose DOWN (DN) trim is accomplished by moving the switch to the up position and Nose UP trim is accomplished by moving the switch to the down position. Operating either trim switch energizes the actuator which moves the horizontal stabilizer.

In NORMAL operation the stabilizer trim actuator is powered via a circuit breaker marked STAB TRIM.

Alternate System 

If the normal trim control system fails, an alternate trim system is available. The alternate trim system consists of a switch labelled ALTERNATE STAB TRIM, NOSE DN, NOSE UP.

An electric trim indicator, and a trim warning light were installed in the upper left portion of the instrument panel. The light will illuminate if "full-up" trim is set, and the engine is producing over 80 percent power. A placard stating, "Set Correct Trim for Takeoff", was installed on the lower instrument panel in front of the pilot position. The airplane's flight manual contains a "Before Takeoff" warning, which states, in part: "Warning - An extreme out-of-trim stabilizer can, in combination with loading, flaps position and power influence, result in an uncontrollable aircraft after the aircraft leaves the ground." In addition, a caution states, in part: "Caution - Failure to set correct trim settings will result in large control forces and/or unrequested pitching/yawing." Pilot actions listed in the "Before Takeoff" checklist include stabilizer trim settings.
The pilot's incorrect setting of the stabilizer trim and his failure to maintain adequate airspeed during takeoff initial climb, usually results in a stall. A factor contributing to the accidents is an inadvertent stall. 

from my personal notes

During my differential training one of the main point of the syllabus was the emengercy of trim Runway. Normally we used to perform it durind descend after dropped the jumpers in Sardinia. 

   Trim Runway Emergency


The most difficult part, after identified the trim runway, is to pull up the breaker during an upset situation, especially because the position is not very reachable. The cheklist could seem very long, but the principle is to deactivate the trim motor (which probably is pushing or pulling continuosly the elevetor) and then use the alternate trim. Initially you have to identify which trim has the malfunction (main or alternate), that's why you pull and push the STAB Trim Circuit Breaker. The main trim is stronger than the alternate trim. 

The breakers panel is below on the left. We have two breakers remarked not by chance.


This is a particular of the ispection of the tail (Preflight)


If you enjoyed this post you can follow me on this BLOG or just subscribe to my Youtube Channel.

lunedì 11 maggio 2020

In volo dalla Sicilia alla Toscana VFR con il Pilatus PC6

La sera prepariamo il nostro volo per riportare il Pilatus in Germania, precisamente l'aeroporto si trova in un lago a confine tra Svizzera e Germania. Volo con Klaus, pilota tedesco che ho conosciuto a Siracusa. Da Siracusa pianifichiamo una tappa a Terni dove faremo rifornimento per poi andare ad Arezzo. Da Arezzo di andrà all'aeroporto di Bolzano dove verranno effettuati i controlli per uscire dall'Italia e fare l'ultima tratta sulle Alpi.


Arriviamo in aeroporto per i controlli a Siracusa che è praticamente ancora notte, il viaggio è lungo e bisogna fare in modo di decollare all'alba. Con noi ci sono altri due passeggeri, come spesso accade nel mondo dei paracadutisti. Il velivolo viene tirato fuori dall'hangar, rifornito al massimo la sera prima, e viene caricato sia di valigie che di equipaggiamento tecnico necessario ai rischieramenti del velivolo.


Io necessito solo di uno zainetto, il velivolo ha i doppi comandi e Klaus da pilota esperto non farà altro che infondere conoscenza ad un pilota meno esperto di PC6 come me. Dal mio canto lui si sente molto sicuro con me per quanto riguarda la navigazione in Italia. 


Cerchiamo subito di impostare una navigazione tra gli 8000 ft ed i 10000 ft, sin dall'attraversamento del CTR di Catania. E' una quota che paradossalmente da meno fastidio alle procedure di avvicinamento. Il Pilatus in crociera va intorno a 120 nodi di crociera, considerando che non c'è pilota automatico, viene avvertito come una velocità molto bassa. Impostiamo il motore intorno i 30 psi, a volte anche meno. 


Sicuramente uno dei ricordi di questa mattinata è il freddo e l'umidità, cosa che in quota si farà sentire ancora di più. Quasi mai avevo impostato l'aria calda a bordo del PC6, ma stavolta l'ho fatto con tutto il cuore come si suol dire. 


Durante il primo tratto in Sicilia puntiamo a FL 100 ad Ovest dell'Etna, dove il Sole sorge dietro il suo cratere regalandoci uno spettacolo unico. Il freddo si fa ancora sentire ed una delle cose più importanti per un pilota in questi casi sono dei buoni guanti per non perdere la sensibilità, anche l'aria calda in cabina sta facendo il proprio lavoro. 


Stavolta lo spettacolo dell'alba è davvero indescrivibile, con il mio lavoro non mi abituerò mai abbastanza a questa meraviglia


Una volta mattina, si apre l'azzurro del Mar Tirreno intorno a noi. Cerchiamo di dividerci i compiti tra condotta e comunicazioni ATC. Ben presto dovremo attraversare il trafficatissimo CTR di Napoli. Lo faremo sorvolando le isole del Golfo. 


Capri ed i suo Faraglioni

Una volta su Napoli puntiamo verso il VOR di Teano passando sotto il controllo del CTR di Grazzanise. Da qui in poi inizierà la nostra tratta su terra verso l'appenino. 

Sorvolo di Napoli

Era da tantissimo tempo che non rivedevo i Campi Flegrei dall'alto.

Da qui in poi i nostri 10000 ft sul QNE diventeranno sempre più relativi, ma nello stesso tempo per i piloti diventa anche la parte del viaggio "un po' diversa". Una volta in Abruzzo le montagne non solo si fanno molto più alte, ma anche gli scenari diventano davvero suggestivi da un punto di vista naturalistico. Sembra di toccare quasi con mano le cime della Maiella.


Il mio Skydemon comincia a suonare  sia per avvisarmi di qualche ostacolo in cima (cominciamo a scendere di quota per l'avvicinamento), sia per suggerirmi cambi di frequenza. L'aeroporto di Terni non è un aeroporto impegnativo, anzi, è un aeroporto bellissimo che mi ricorda il raduno piloti del 2013
. 


Il rifornimento avviene alla colonnina ubicata in un'area apposita in maniera abbastanza automatizzata.


Ridecolliamo con l'intento di salvaguardare compatibilmente il carburante, non c'è nemmeno bisogno di decollare con 46 PSI di torque. Il volo da Terni ad Arezzo è molto più breve, siamo subito sotto il controllo di Perugia e ce lo facciamo a 1000 ft AGL seguendo i punti di riporto standard (VRP).  Sorvoliamo tutto il lago Trasimeno come istruiti dal controllo di Perugia. Anche Arezzo ha una pista in asfalto niente male e sufficientemente lunga. Nell'area aeroportuale sopra ad Arezzo non c'è praticamente nessuno, siamo i soli nello spazio aereo. Devo dire che è davvero un bell'aeroporto e qui troviamo il supporto della Skydive Arezzo. 


If you enjoyed this post you can follow me on this BLOG or just subscribe to my Youtube Channel.

martedì 15 maggio 2018

Abilitazione su PC6 B2H4 (Pilota + 10 Paracadutisti)

Il Pilatus PC-6 Porter è prodotto dall'azienda svizzera Pilatus Aircraft Ltd. sin dagli anni sessanta. Nelle sue prime versioni era dotato di motori a pistoni, progressivamente sostituiti con motore turboelica, da qui la designazione PC-6 Turbo-Porter. Per capire la nomenclatura delle varie versioni, il PC-6/B Turbo-Porter fu la prima versione con motore turboelica, dotato di una Pratt & Whitney Canada PT6A-6A da 410 kW (550 cv). La serie B è equipaggiata con i vari PT6A-20/-27/-34 caratterizzati dalla manetta Low Idle - High Idle che, pur non modifcando l'output di potenza, ne regola il funzionamento al minimo e nelle transizioni di potenza. Nel particolare esistono le varie sottoversioni: il PC-6/B1 Turbo-Porter è la versione turboelica dotato di una Pratt & Whitney Canada PT6A-20 da 410 kW (550 cv), mentre il PC-6B2 Turbo-Porter è la versione turboelica con motore Pratt & Whitney Canada PT6A-27 da 507 kW (680 cv), flat rated a 550 cv (è tra i modelli più diffusi). In generale la "B" designa il motore PT6 (A e C, ed il prototipo D, hanno turbine diverse). La versione B2 ha sottovarianti in B2H2 e B2H4. La differenza tra i due che è che il B2H4 ha la struttura irrobustita, è più pesante e può portare due persone in più (normalmente ha anche i trim e flaps elettrici invece delle classiche manovelle che piacciono tanto ai "veri" piloti di Pilatus).

Specifiche PC6 B2H4

Quando ricevo la chiamata per poter effettuare il training penso: "finalmente!". Cerco di accumulare piú appunti possibili e mi imbarco con un volo Ryanair dalla Sicilia alla Sardegna insieme ad un college con il quale condivido l'avventura. Al centro ci aspetta un ambiente dinamico e vivace, non é facile trovare il campo al primo tentativo, ma una volta arrivati ci mettono subito a nostro agio. Il capocentro é molto esigente e ci spiega molte cose, ma soprattutto ci fa un briefing attento e preciso sull'importanza della sicurezza e dell'attività da fare. La sera siamo ospiti a casa sua con altri paracadutisti, ci sono anche paracadutisti stranieri e non manca modo di fare amicizia e raccontarsi aneddoti.


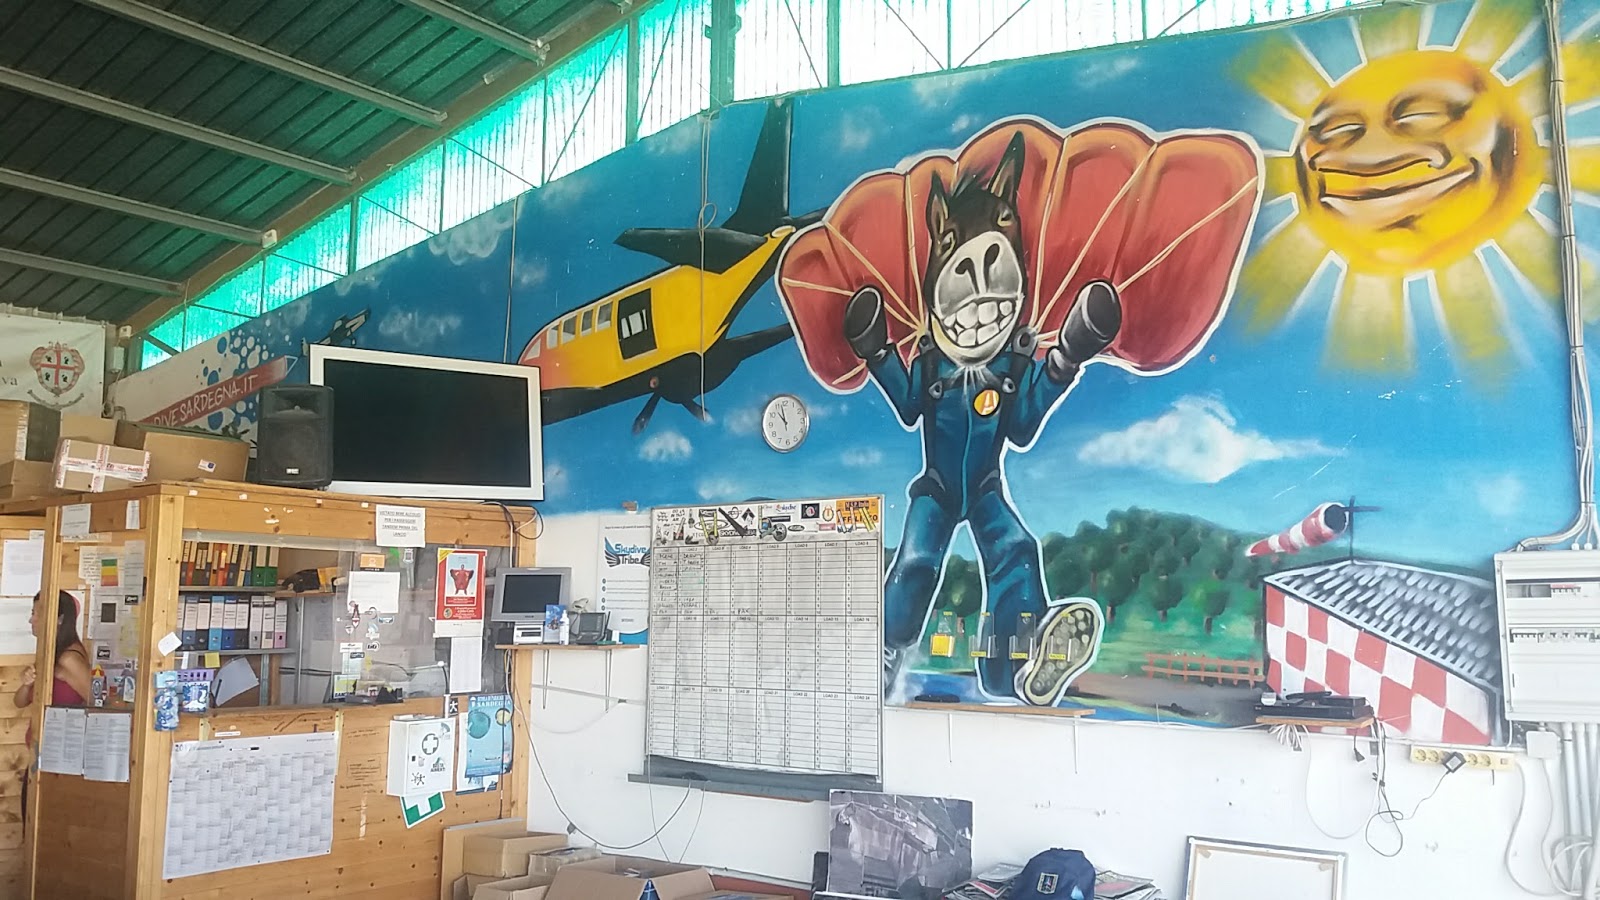
L'interno dell'hangar della Skydive é davvero suggestivo

Il primo arrivo al centro

Quindi la mattina dopo ci aspetta Paco, il famoso esaminatore della Zimex. Il briefing di Paco é davvero attento e professionale, le nozioni sono tante e cerchiamo di prendere più appunti possibili. Nel frattempo l'aereo viene portato fuori e suscita una certa emozione. Prima di effettuare il primo volo sul B2H4 ci vengono mostrati dei video dal cockpit che servono ad imparare il più possibile a terra perché in volo non si scherzo e non si può perdere, da oggi iniziano i lanci operativi e solo durante il rientro c'é un po' di spazio per il delta training. Una delle priorità sono le emergenze che riguardano i trim, in quanto qui abbiamo un sistema elettrico formato da un motorino principale ed uno di emergenza. La difficoltà piú grande é trovare velocemente il breaker da tirare durante l'emergenza simulate, si trova in basso a sinistra e non é facile quando il cavallo pazzo decide di buttare giù il muso con decisione e devi mantenere il controllo del velivolo.

Bisogna prendere confidenza con il cockpit diverso, soprattutto per il pannello delle spie.

Dopo il primo lancio nella fase di discesa mettiamo in pratica le procedura di emergenza del Trim Runaway applicando la checklist e quanto spiegato da Paco. In realtà il tempo è davvero poco e la prima cosa da fare e disabilitare i trim dall' interruttore della piantana centrale, capire qual è quello che non va (main o eme) e disabilitare il breaker giusto in basso a sinistra (già difficile acquisire manualità in un volo livellato, figuriamoci quanto un trim runaway ti rende il difficoltoso il controllo dell' aereo!).

Bisogne prendere dimestichezza con l'attivitá di rifornimento. C'é una tecnica precisa per salire.


Ovviamente ci sono alter differenze con il B2H2, per prima cosa si sente che é un velivolo piú pesante, l'ingresso dalle portiere agevola molto le operazioni del pilota, a sinistra abbiamo il classic pannello con la batteria, luci, starter, ecc. Al centro il pannelle delle spie e l'indicatore dei trim elettrici. Il velivolo é anche strumentato per un discrete volo strumentale. Il GPS é il classic Garmin che bisogna subito imparare ad usare, anche se é molto intuitivo. Sulla piantana centrale ci sono anche il comando dei flap (che qui sono elettrici) ed il sistema dei trim di emergenza. Un'altra esperienza nuova é sicuramente il fatto di decollare con 11 persone a bordo. Si sente, soprattutto alle alte temperature. In decollo non si vede l'ora di staccare le ruote da terra, si sente quei 5/10 nodi in piú rispetto ai decolli durante il Class Rating. Se provi a tirare troppo la barra te la senti vibrare sotto le mani; é un mezzo pesante e possente. Durante il decollo si cerca di rosicchiare progressicamente quei decimi di torque fino al limite per avere la coppia massima e staccarsi il prima possibile e mettere fine ad una fase critica per il PC6, il decollo appunto. Una volta in aria bisogna solo pensare a deconfingurare i flap, trimmarlo bene e... salire... salire e salire... Con calma si chiama Decimomannu e si cerca di aver l'autorizzazione prima possibile. 


Bisogna avere le orecchie buone per gestire contemporaneamente le attivitá con la biga del centro. La parola d'ordine é "non perdere tempo". I primi voli sono una continua ricerca del giusto punto di lancio, ma soprattutto di arrivare al punto di lancio dei para esattamente alla fine della salita a 14.000 ft. Durante tutto il volo l'esaminatore Zimex é sempre vigile e attento e piú di una volta pronto a intervenire.


Una delle grosse sfide in Sardegna sono i forti venti laterali, a volte si hanno pista lunghe ma non tutta la pista é spesso in condizioni perfette e sta al pilota capire bene la parte migliore dove mettere le ruote (sono sempre dei campi...). 

 
Una giornata di lavoro aereo volge al termine. Riportiamo l'aereo nella sua cuccia.


If you enjoyed this post you can follow me on this BLOG or just subscribe to my Youtube Channel.